Start RfcAgiler and click on her option in the menu "Tools".
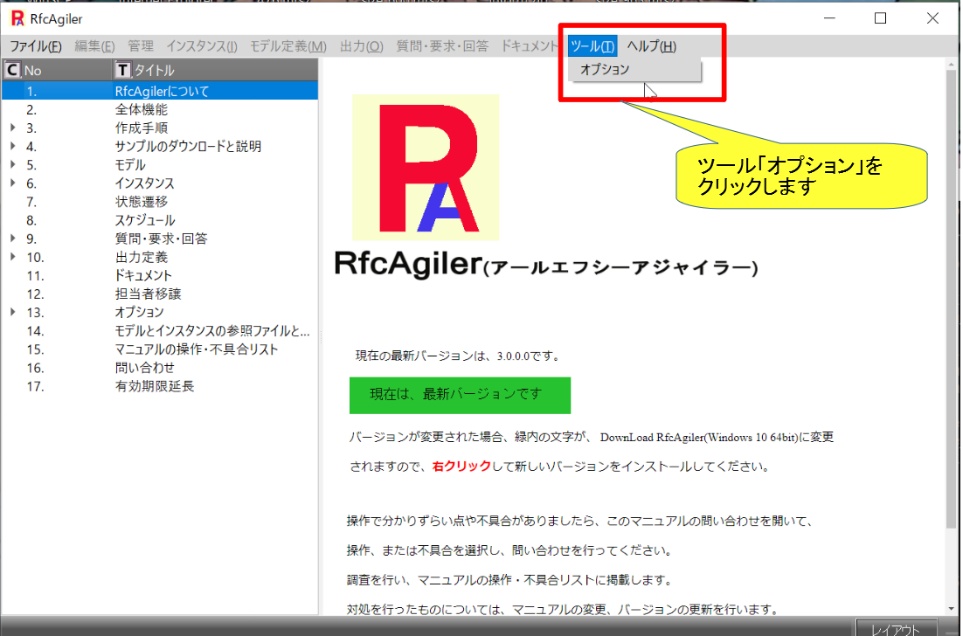
An options screen will be displayed.
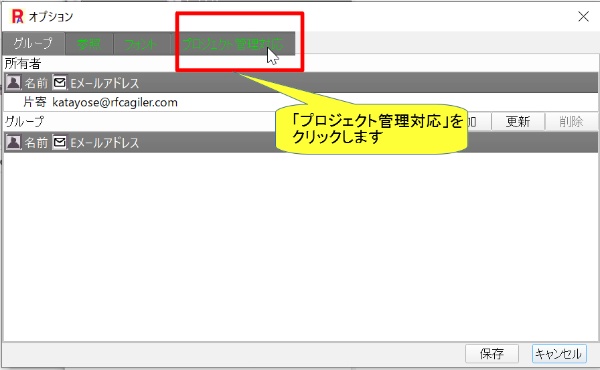
The project management compatible screen will be displayed
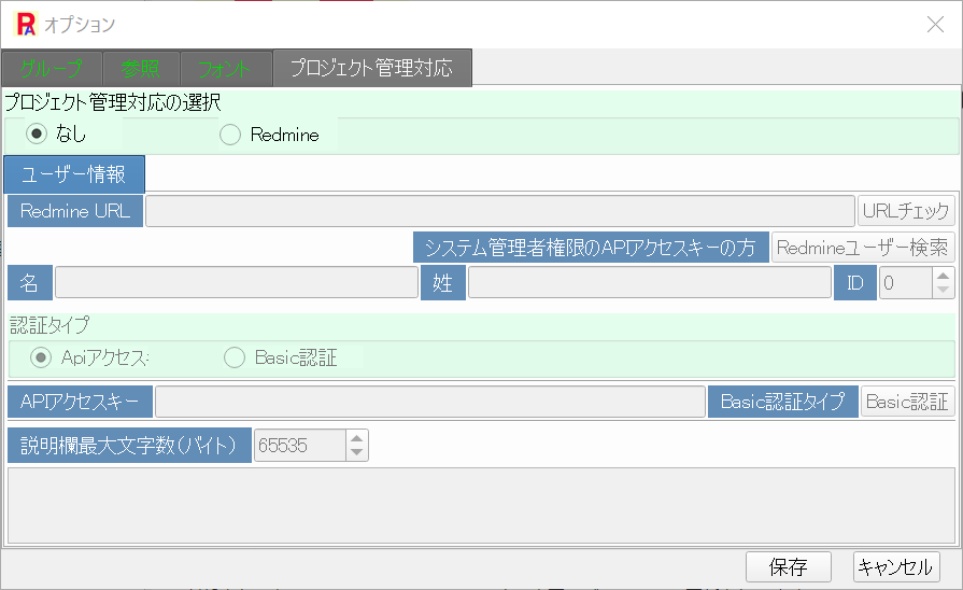 a. Select the radio button for project
management support and select Redmine.
a. Select the radio button for project
management support and select Redmine.
 b. Set the URL of your Redmine.

If the URL check is correct

If the
URL check is incorrect
 c. Select the authentication type.
There are two authentication types: API access type and Basic
authentication type.

[API access]
API access key can be obtained by logging in with
redmine
It can be obtained from personal settings.

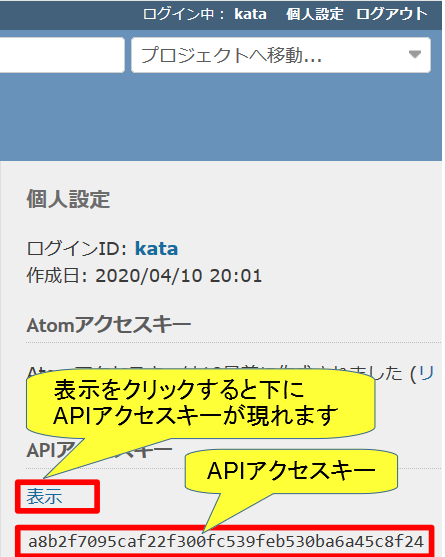
Enter the API access key above.

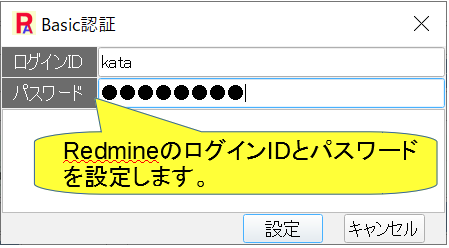
[Basic authentication]
This is set every time RfcAgiler is started.
(Not saved)

A login screen will be displayed.
 d. Set Redmine user information in
RfcAgiler's own user information.
d. Set Redmine user information in
RfcAgiler's own user information. Click on Redmine
User Search.

The project management user information acquisition screen will be
displayed.
Get your own user information from a group or name
(set last name, first name, and email) for Redmine administrative users.
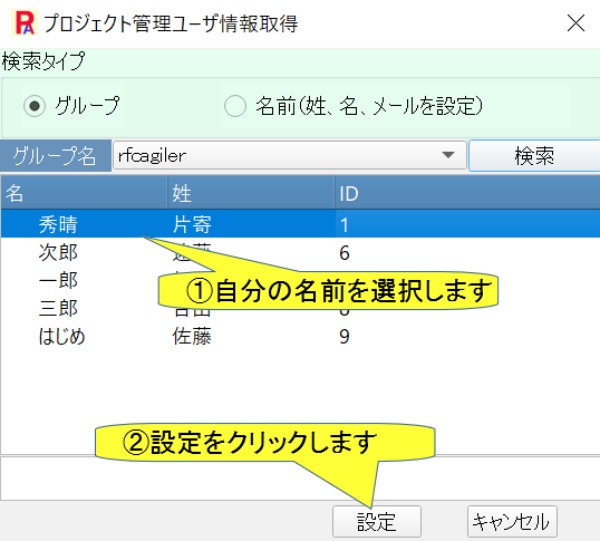
[Group]
A list of Redmine administrative user group names is
displayed in Group Name.
Select the group name you belong to to get the desired users.

The search results will be displayed.
[Name (Set last name, first name, email)]
Enter user name, last
name, first name, and email to obtain user information.
Here you can search by name.
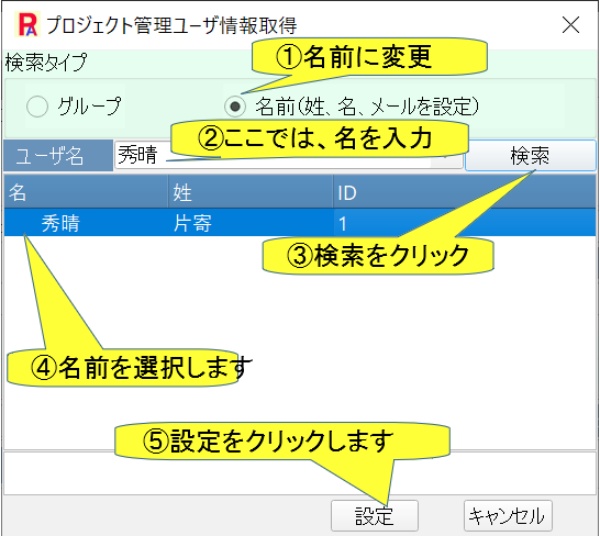
Click Settings to set your first name, last name, and ID.
 e.
Character limit for RfcAgiler description to be output in Redminen
description field
Set the limit in bytes when setting the description in RfcAgiler in
e.
Character limit for RfcAgiler description to be output in Redminen
description field
Set the limit in bytes when setting the description in RfcAgiler in
the Redmine project description field or ticket description field.
(Initial setting value: 65535 bytes)
 Note:
The character limit must not be greater than the character limit for
Redmine's description field.
Note:
The character limit must not be greater than the character limit for
Redmine's description field.
 2. Initial configuration of Redmine with RfcAgiler