 5.Creating a project from a model

We will create a project from the model created in step 4.
Click
"New Instance" in the menu.
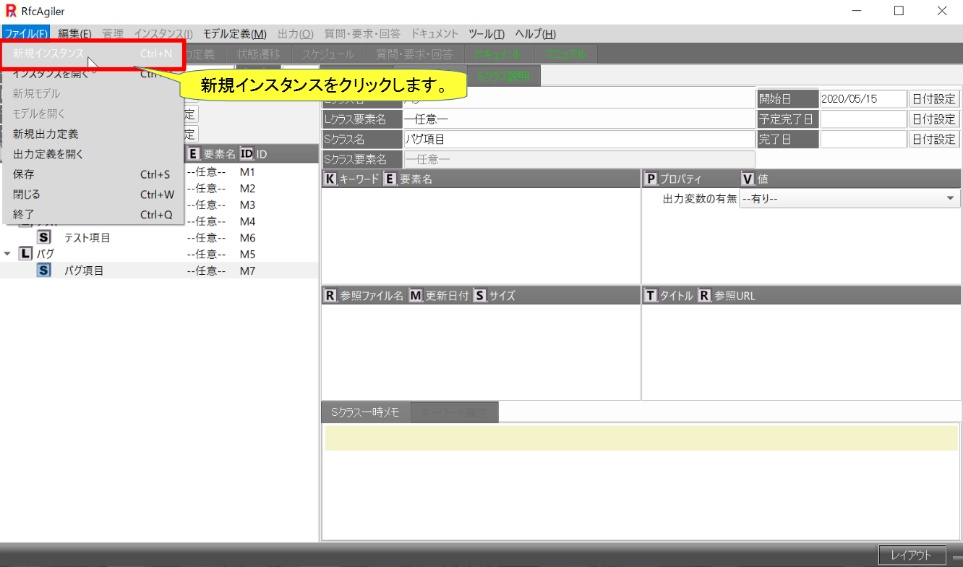
The new instance screen will be displayed.
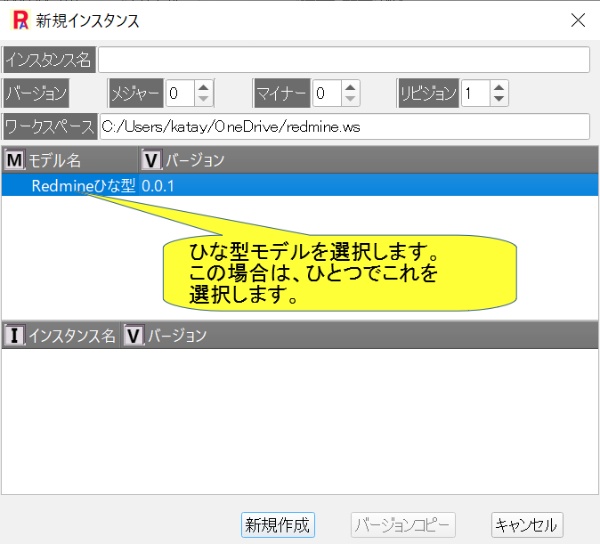
First, select the model name you want to use.

Instance name: here enter the project name (e.g. Project A)

Workspace: Displays the newly created directory.

After setting the instance name, click "Create New".

The instance management screen will be displayed.
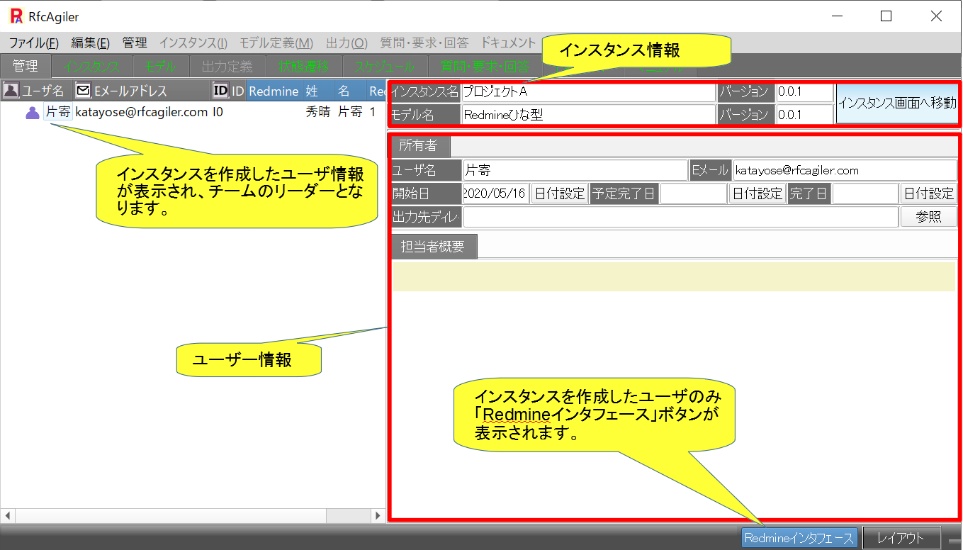
Add members to the project.
Click "Manage" - "Add User" in the menu.

The Add User screen will be displayed.
Select and add the users you want to add.
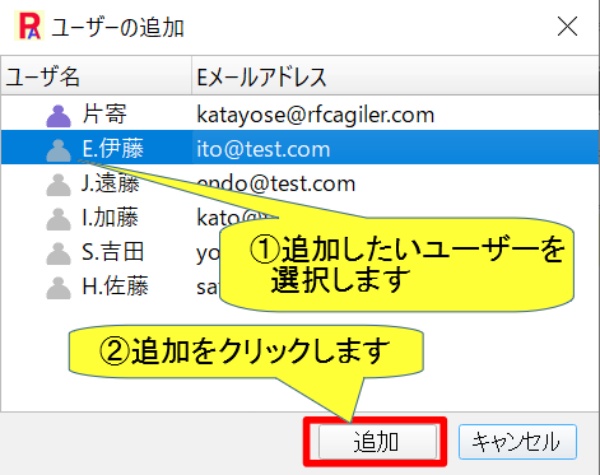
The user will be added.
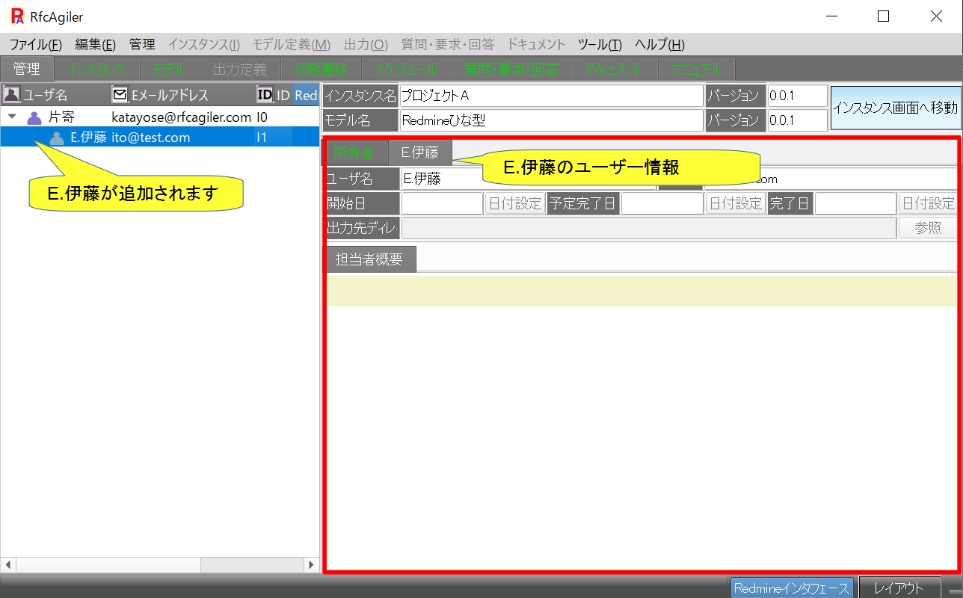
Register the remaining members in the same way.
Regarding project A, the project leader is Katayose,
The members are E. Ito, J. Endo,
I. Kato, and S. Yoshida.
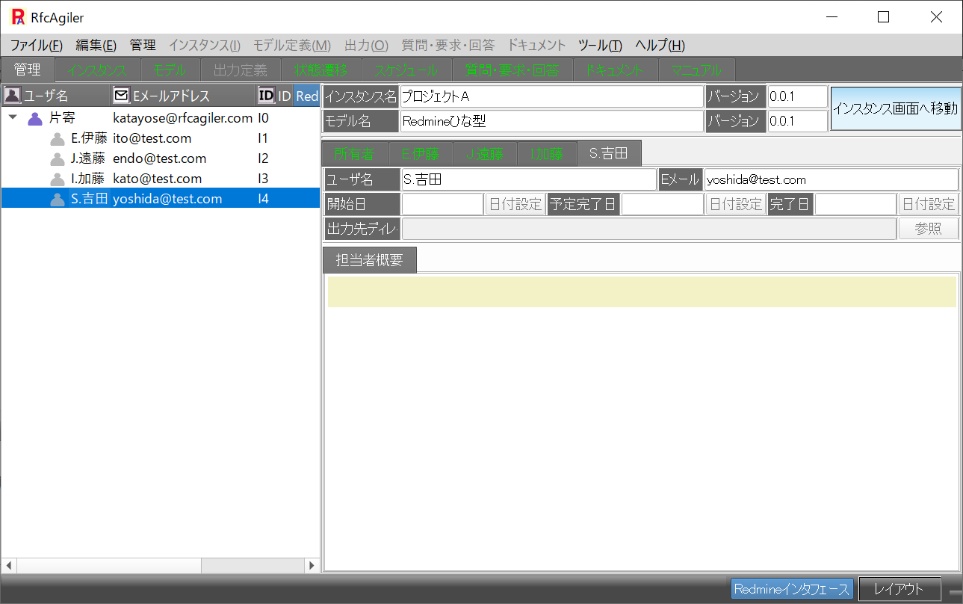
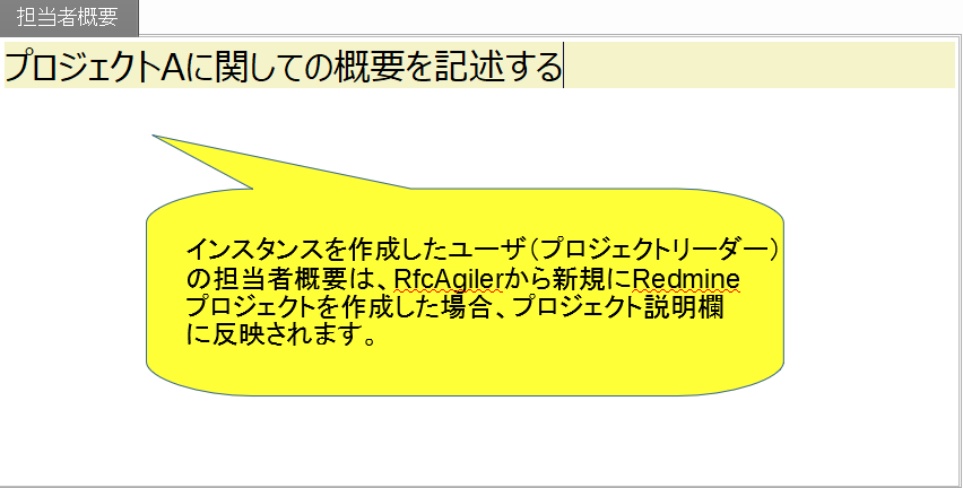
Next, set the start date, scheduled completion date,
and summary of each
person in charge (each user) to begin work.
These edits can only be edited by the configured user.
Other users can only view it.
開始日、予定完了日の編集

Click the date setting button for the start date.
The start date setting screen will be displayed.
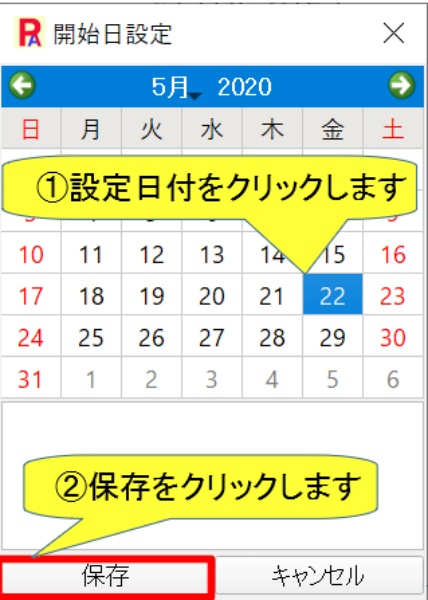
The start date will change.

Similarly, for the scheduled completion date, click the date setting button
and
set the date in the same way as above.

a person of charge setting summary
Save the instance.
Click "File" - "Save" in the menu to save.
Or Ctrl+S to save.
【open
an instance】
From now on, when dealing with instances in How to Use (Basic Edition) and
How to Use (Advanced Edition),
the explanation will be given with the
instance opened using the method below.
To
open this instance, click "File" - "Open Instance" from the menu.
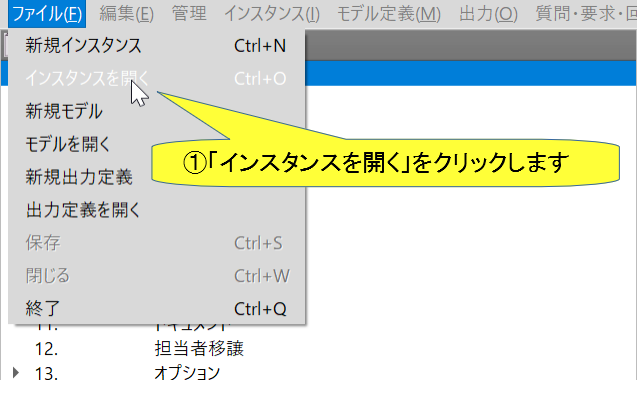
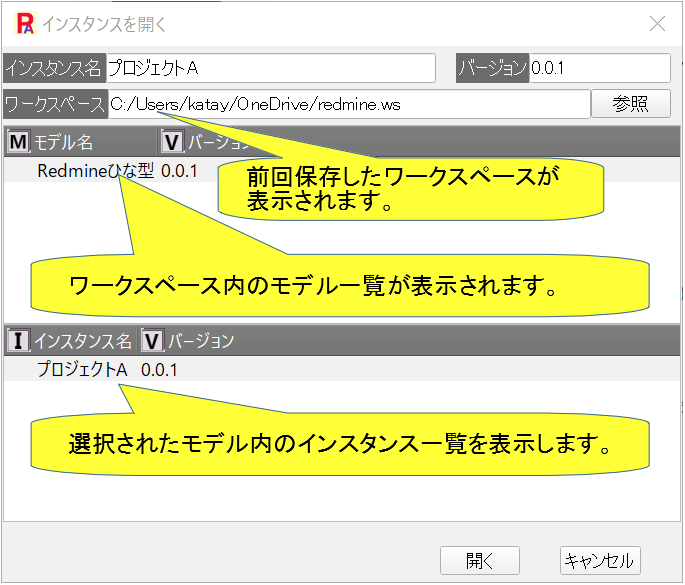
The "Open Instance" screen is displayed.
The last saved workspace will be displayed.
Select a model from the model name and version from the model list.
Here, the model name: Redmine template and
a list of instances within
the selected model are displayed.
Here, select Instance Name: Project A.
Click "Open".
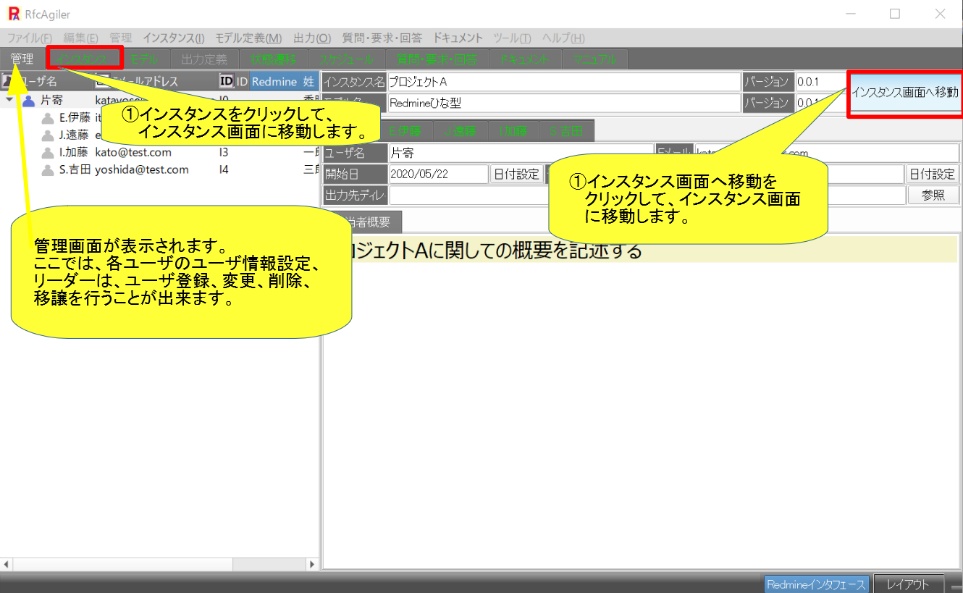
The "Management" screen will be displayed.
Click "Instance" or
"Go to Instance Screen" to go
to the Instance screen.
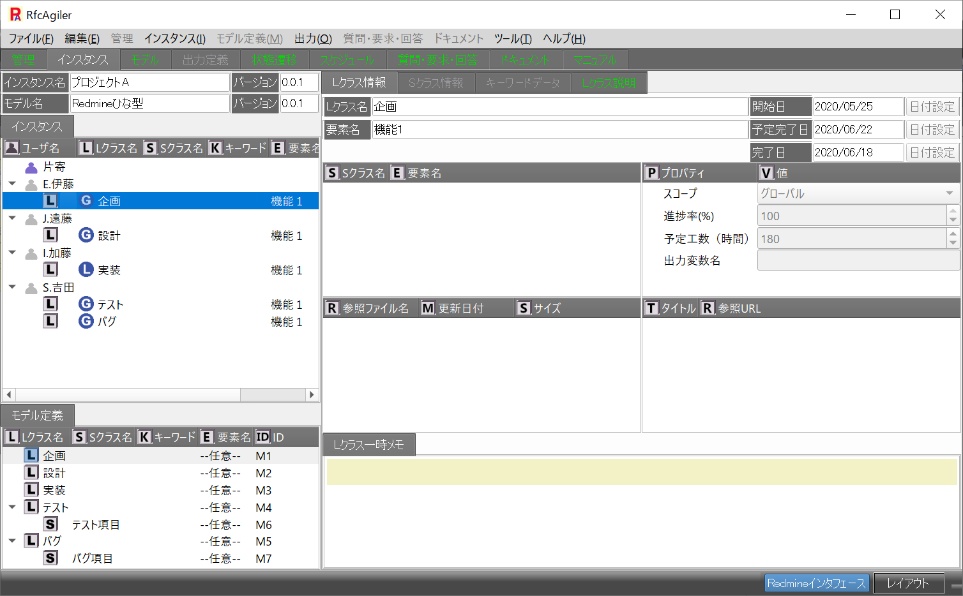
The instance screen will be displayed.
 5.Creating a project from a model


