 8.Automatically create/update/delete RfcAgiler
tickets in Redmine
First, set the start date and expected completion date for each member
in Instance Management.

Set the start date, planned completion date, and planned man-hours
for
the Lclass of the instance.

Check the set results on the schedule.
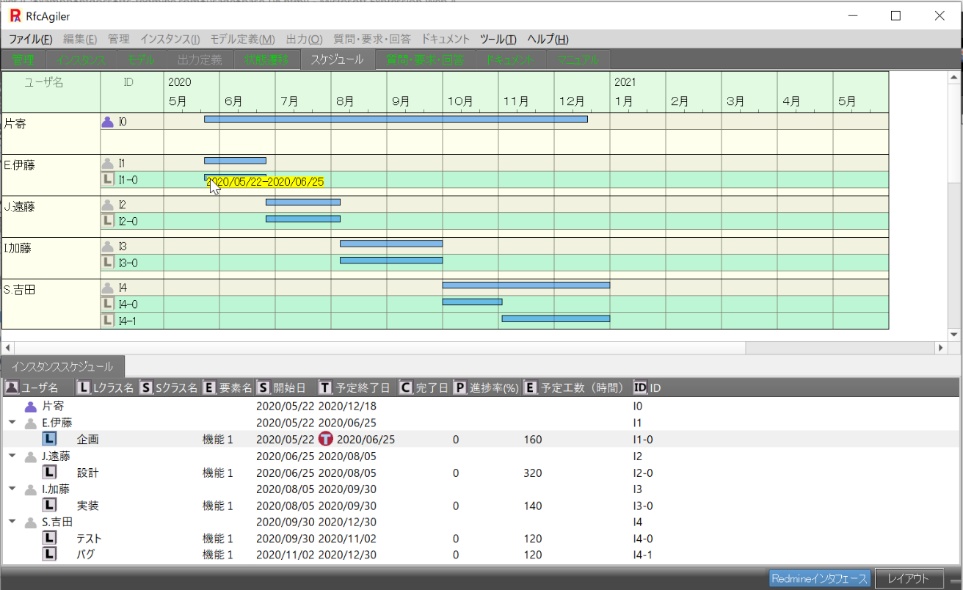
Click the menu "Management" - "Redmine Interface" or the Redmine interface
at the bottom right of the screen.
On the Redmine interface screen,
go to the Redmine ticket (add, change, delete) interface screen.
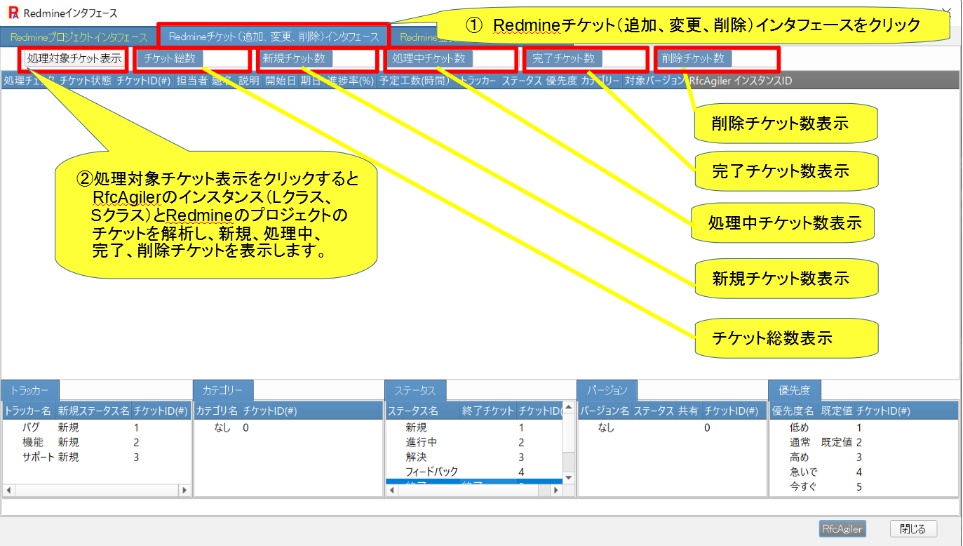
Click Display Ticket to Process to display ticket information.
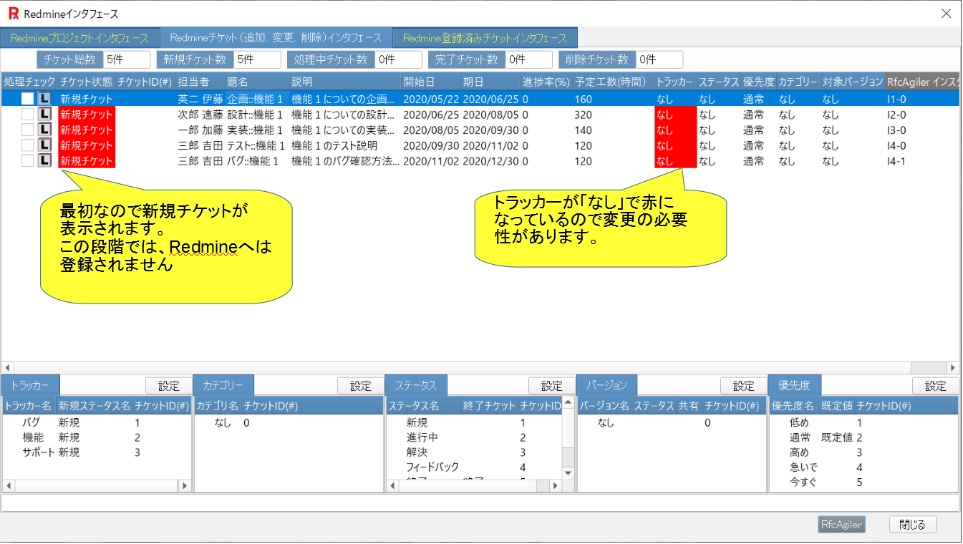
Initially, a new ticket will be displayed. Set up your tracker here.
Select New Ticket and select the tracker you want to set up in Tracker at
the bottom left.
Click the settings button or double-click to change the
tracker for new tickets.
It also sets the tracker's initial status.
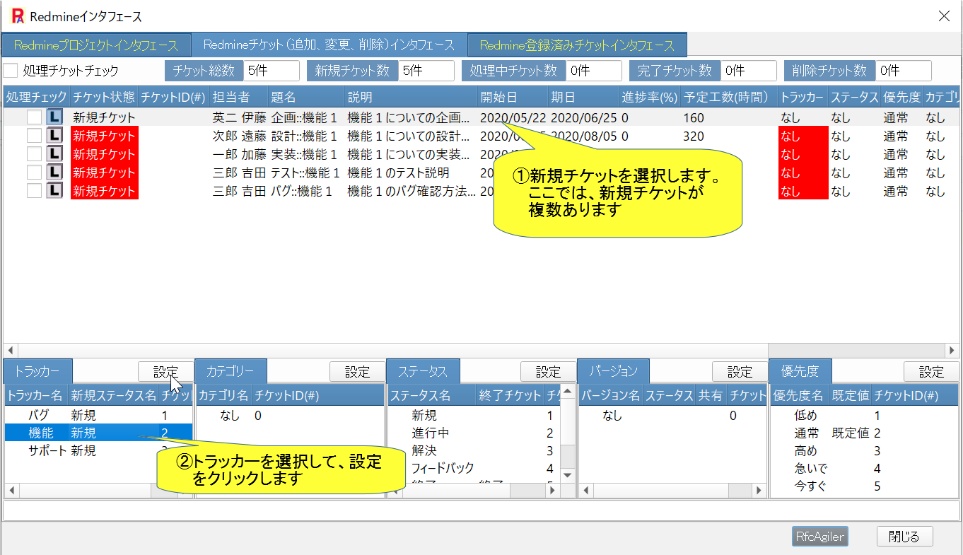
If there are multiple new tickets, a message will be displayed asking if you
want
to make changes to all the selected trackers at once.
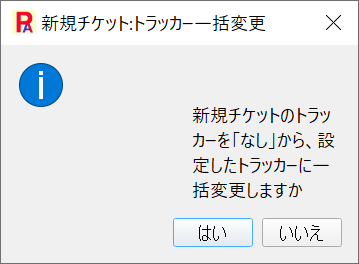
If you select "Yes", the changes will be made all at once.
If you select "No", only the selected item will be changed.
If you select "Yes", it will look like the image below.
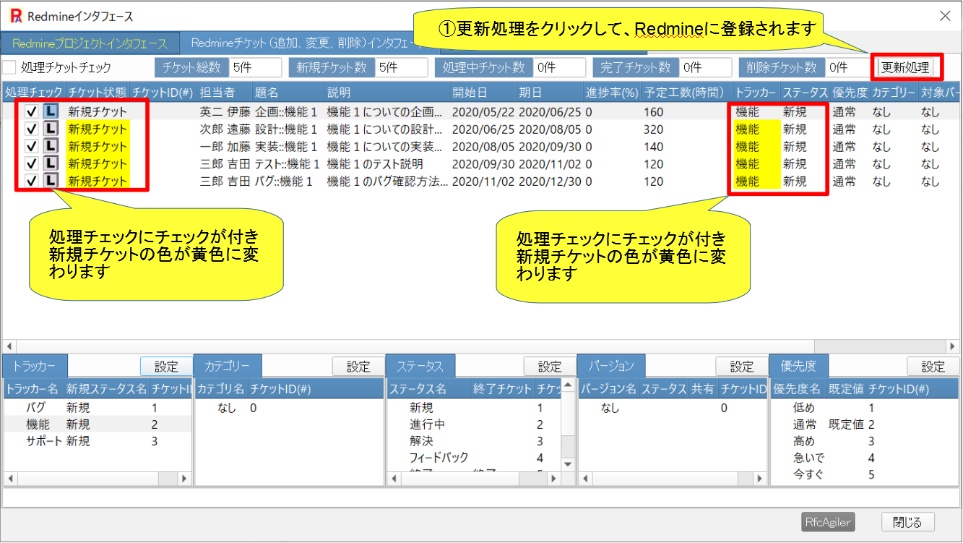
To register with Redmine, click "Update process".
It will be registered in Redmine and will change from "New Ticket" to
"Processing Ticket".
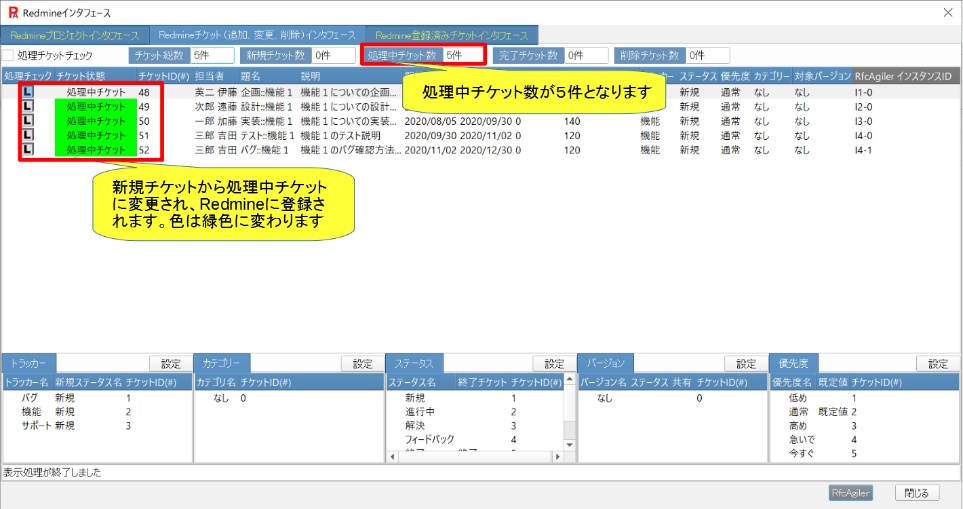
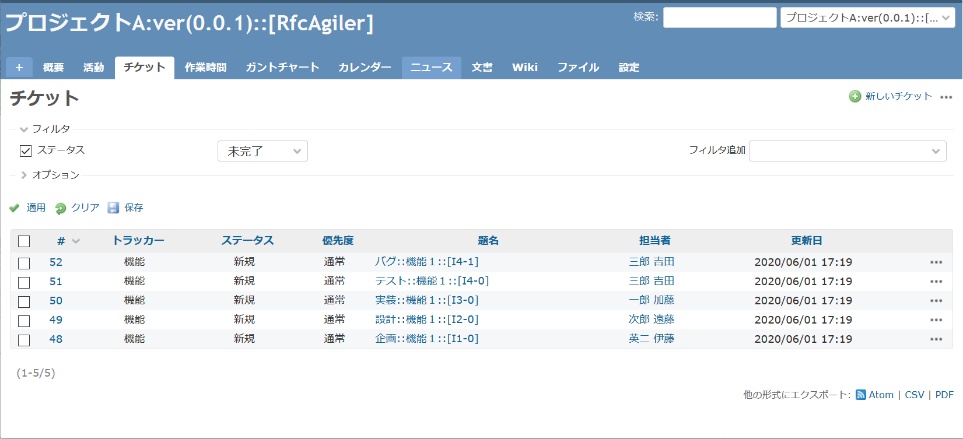
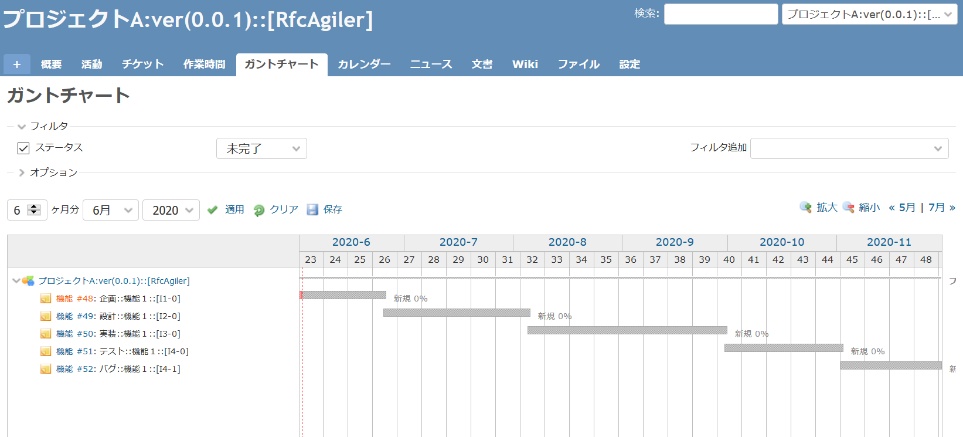
View Redmine tickets.
Also look at the Gantt chart
 8.Automatically create/update/delete RfcAgiler
tickets in Redmine


